Understanding Diecast Decals Basics
Diecast decals are essential for adding realistic details and branding to your model cars, trucks, and other vehicles. These tiny works of art can transform a basic diecast model into a stunning replica, reflecting the real-world aesthetics of the vehicles they represent. Whether you are a seasoned modeler or a beginner, understanding the fundamentals of diecast decals is the first step toward achieving professional-looking results. This guide provides a comprehensive overview of the process, from selecting the right materials to mastering advanced techniques.
What Are Diecast Decals
Diecast decals are essentially miniature, high-quality stickers. They are designed to adhere to the surfaces of diecast models, providing the detailed graphics, logos, and markings found on real vehicles. These decals are typically made from thin, flexible materials that conform easily to the contours of the model. They are pre-printed with various designs, ranging from simple badges and stripes to intricate sponsor logos and racing liveries. The goal is to replicate real-world vehicle appearances accurately and beautifully.
Types of Diecast Decals

Diecast decals come in several types, each with its own characteristics. Waterslide decals are the most common, as they are affordable, widely available, and easy to use. They involve soaking the decal in water to release it from the backing paper, allowing it to be slid onto the model surface. Self-adhesive decals offer a quick and easy application process, as they have an adhesive backing. However, they can be less forgiving during application. Dry transfer decals use a transfer sheet and require burnishing to apply the graphic to the model. Each type has pros and cons, and the best choice often depends on the project and the modeler’s skill level.
Materials Needed for Diecast Decals
To create stunning diecast decals, you’ll need a selection of materials. This section covers the essential items required, ranging from printers and papers to the final sealing products. Having the right materials ensures that your decals are durable, look professional, and adhere to the model correctly. The quality of these materials plays a significant role in the final outcome, so choose wisely and invest in products that are designed for this specific purpose.
Printers for Decals
The printer you choose will significantly affect the quality of your decals. Inkjet printers are generally preferred for diecast decals, as they can print on a wide range of decal papers and vinyls. Laser printers can also be used, but the heat from the fuser can sometimes affect the decal material, so it’s essential to use papers specifically designed for laser printers. When selecting a printer, consider the resolution, color accuracy, and the ability to handle thin materials. High-resolution printers can produce more detailed graphics, leading to more realistic results for your diecast models.
Paper and Vinyl for Decals

The paper or vinyl you print on is the foundation of your diecast decals. Waterslide decal paper is the most common choice, consisting of a thin, transparent film coated with an adhesive. It’s available in various finishes, including clear, white, and transparent, which lets you choose the best background for your design. Vinyl, particularly adhesive-backed vinyl, is also used for more durable decals. The choice depends on the complexity of the design, the desired finish, and the durability needed. Always ensure the material is compatible with your printer type to avoid smudging or poor print quality.
Sealing Materials for Decals
Sealing your decals is crucial to protect them from damage, water, and fading. Clear coats and sealants provide a protective layer, giving your decals a professional finish. Acrylic clear coats are popular, as they are easy to apply and dry quickly. Enamel clear coats offer excellent durability but take longer to dry. When selecting a sealant, consider factors such as the desired finish (matte, satin, or gloss) and the compatibility with the decal paper and the paints on your model. Multiple thin coats are better than one thick coat to avoid runs or imperfections. Proper sealing ensures your decals last and maintain their appearance over time.
Step-by-Step Guide to Making Diecast Decals
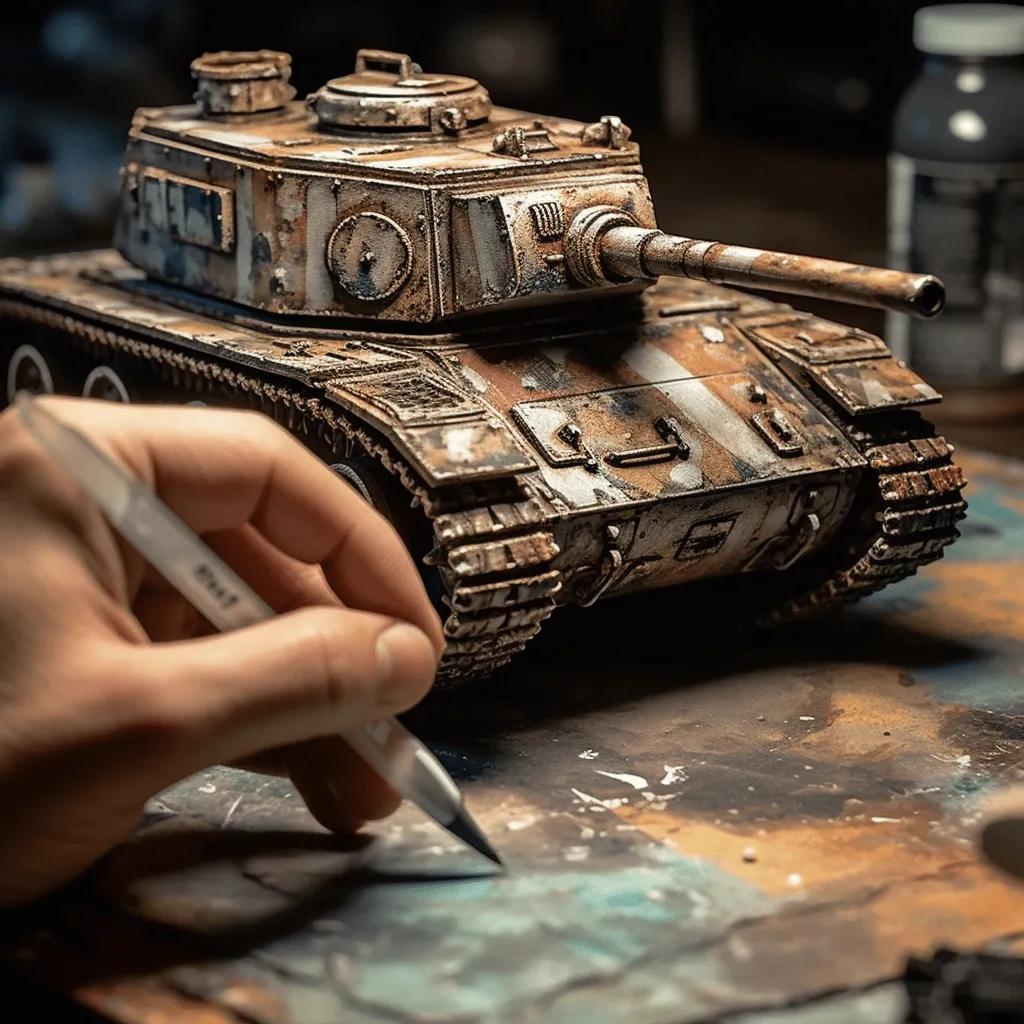
Creating your own diecast decals is a rewarding process that allows for complete customization of your model cars. The process requires careful planning and execution, but the results are worth it. Following these steps ensures that you achieve high-quality, professional-looking decals that enhance the overall appearance of your diecast models. From initial design to final application and sealing, each step is important to a successful outcome.
Designing the Decals

Before you can print, you’ll need to design your decals. Use graphic design software, like Adobe Photoshop or Inkscape, to create or modify your desired graphics. Ensure the design is the correct size and resolution for your model. Consider the colors, fonts, and details of your design to match the original vehicle or create a unique look. Planning the layout and arrangement of the decals on your sheet is vital to efficient printing. Make sure to mirror any designs that will be applied to the model’s interior or other mirrored surfaces.
Printing the Decals
Once your design is ready, print it onto your chosen decal paper or vinyl. Follow the printer’s instructions and ensure the settings are optimized for your material. Use high-quality print settings to ensure detailed and accurate reproduction of your design. After printing, allow the decals to dry completely before handling. For waterslide decals, you can apply a clear coat over the printed design to protect the ink. This step is extremely important to prevent the ink from running or fading when the decal is immersed in water. For self-adhesive decals, ensure a good bond with the adhesive to the backing material.
Cutting the Decals
Precision is critical in cutting your decals. Use a sharp hobby knife or a die-cutting machine to carefully cut out each decal along its edges. For waterslide decals, trim as closely as possible to the design to minimize the clear film visible on the model. For self-adhesive decals, a die-cutting machine is extremely useful. Take your time and be meticulous to ensure clean, precise cuts. Small, sharp scissors or specialized decal trimming tools can also be extremely helpful for detailed and curved cuts.
Applying the Decals

The application process varies depending on the type of decal. For waterslide decals, soak the decal in water until it easily slides off the backing paper. Position the decal on the model surface and use a soft cloth or cotton swab to remove any air bubbles and excess water. For self-adhesive decals, carefully peel them from the backing paper and apply them to the clean model surface. Work slowly and carefully, and use a hobby knife or a pointed tool to help position the decal accurately. For dry transfer decals, use the burnishing tool to transfer the image to the model surface.
Sealing and Finishing Touches
Once the decals are applied and fully dry, it’s time to seal them with a clear coat. This protects the decals from damage, UV light, and wear. Apply several thin coats of the clear coat, allowing each coat to dry completely before applying the next. This approach prevents runs and imperfections. After the clear coat is dry, you can add finishing touches, such as weathering effects or panel lining, to further enhance the realism of your model.
Common Mistakes to Avoid
Even with the best intentions, beginners often make mistakes when creating diecast decals. Recognizing and avoiding these common pitfalls can save time, money, and frustration. Proper preparation, patience, and attention to detail are the keys to success in decal making. This section covers the errors most frequently encountered and how to circumvent them.
Choosing the Right Materials

Selecting the wrong materials can lead to disastrous results. For instance, using the wrong type of decal paper for your printer, may result in the ink smearing or not adhering to the paper. Similarly, using an incompatible clear coat can cause the decals to dissolve or wrinkle. Always check the manufacturer’s recommendations for your printer, paper, and clear coat, and make sure all materials are compatible. Testing materials on a small scale before starting your project is also a good practice.
Avoiding Air Bubbles and Imperfections
Air bubbles and imperfections are common problems. They can ruin the look of your decals. When applying waterslide decals, make sure the model surface is clean and free of dust or debris. Use a soft cloth or cotton swab to gently push out any air bubbles as you position the decal. For self-adhesive decals, apply them slowly and carefully, avoiding any wrinkles. If a bubble appears, try to gently lift the decal and reapply it. Proper application techniques will minimize these issues and give you a smoother, more professional finish.
Troubleshooting Tips
Even the most experienced modelers face challenges. If your decals are not adhering, the surface may not be clean, or the clear coat may be incompatible. Ensure the model’s surface is clean, and use a suitable decal setting solution or softener to help the decal conform to the model’s contours. If the ink is smudging, your printer settings may be incorrect, or the decal paper may be incompatible. Experiment with different settings and materials. Always be patient. Sometimes, trial and error is required.
Advanced Techniques for Diecast Decals

Once you’ve mastered the basics of making diecast decals, you can explore more advanced techniques to improve your results. These methods allow for more intricate designs, greater realism, and a professional finish. Mastering these techniques will set your models apart and reflect a higher level of craftsmanship. This section will introduce you to some of the advanced techniques used in creating diecast decals.
Using Clear Coats and Sealants
The clear coat is not just for protection; it can also enhance the appearance of your decals. Choosing the right clear coat can provide the desired finish. A glossy clear coat gives a shiny, polished look, while a matte clear coat provides a more realistic, less reflective appearance. Applying multiple thin coats, instead of one thick coat, prevents runs and pooling. Experiment with different clear coats to achieve the finish you desire, and remember that the clear coat can also affect the durability and the overall aesthetic of your final product.
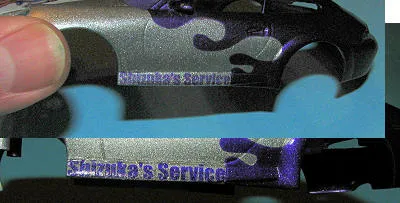
Creating Custom Decals
Creating custom decals allows you to add unique designs and logos. Use graphic design software to design your decals. Create a template for your diecast model and add custom logos, names, or sponsor graphics. Print the custom decals onto decal paper, and apply them to the model following the standard procedures. Custom decals allow for a high level of personalization, which makes your models unique. This technique is used in making custom racing liveries or creating fictional model designs.
Working with Complex Designs
Working with complex designs requires extra care and attention. Intricate graphics, detailed logos, and large decals can be more challenging to apply. When applying complex decals, cut them into smaller sections to make them easier to handle. Use decal setting solutions and softeners to help the decals conform to the model’s contours and remove any air bubbles. Take your time and work slowly, and always have extra decal paper on hand in case of mistakes. Practice and patience are key to successfully applying intricate decals.
In conclusion, creating high-quality diecast decals requires understanding the basics, using the right materials, and following a step-by-step process. From understanding different decal types to applying them seamlessly, this guide has provided a comprehensive overview. By avoiding common mistakes and exploring advanced techniques, modelers can achieve professional-looking results, transforming ordinary diecast models into stunning replicas. Embrace the craft, practice consistently, and watch your models come to life with stunning detail and realism.