Choosing the Right Paint for Diecast Cars
Painting diecast model cars is a rewarding hobby that allows you to customize and restore these miniature vehicles. The choice of paint is crucial for achieving a professional-looking finish. Different types of paint offer varying characteristics in terms of application, durability, and appearance. Understanding these differences is the first step towards a successful paint job. This guide will cover the most common types of paints used for diecast models, helping you choose the best option for your project.
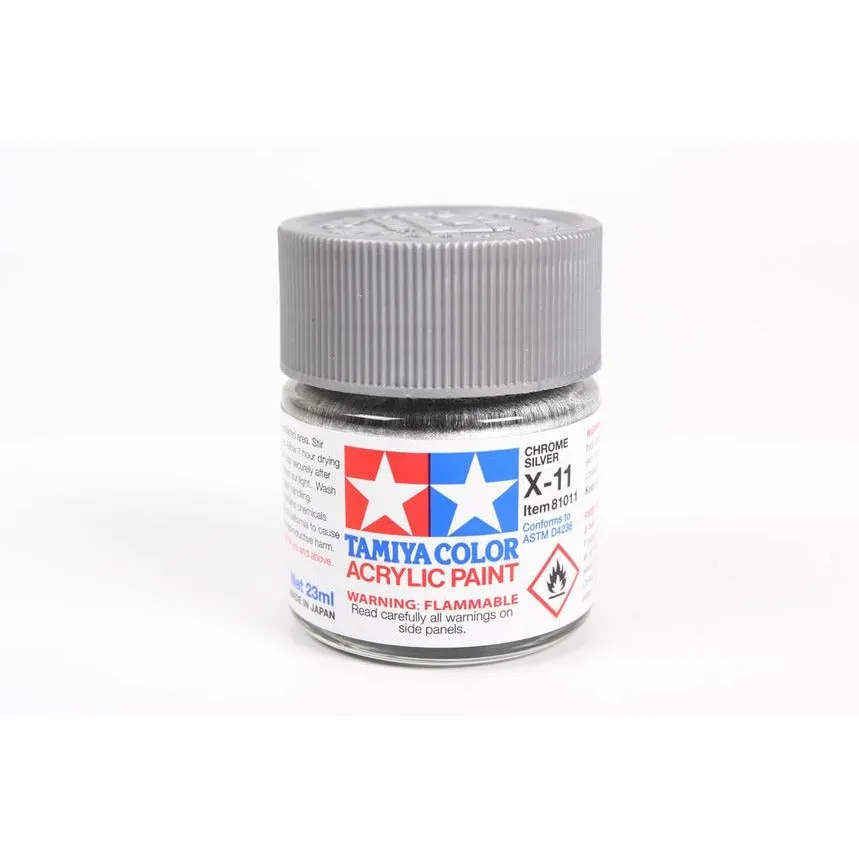
Acrylic Paints
Acrylic paints are water-based and known for their low odor and ease of use. They are a popular choice for beginners due to their forgiving nature and quick drying times. Acrylics come in a wide range of colors and can be thinned with water or acrylic thinners, making them versatile for both brush and airbrush applications. These paints are also relatively easy to clean up, requiring only soap and water before they dry. Their versatility and ease of use make them a great choice for modelers of all levels.
Advantages of Acrylic Paints
Acrylic paints offer several advantages. They have low toxicity and produce minimal fumes, making them safer to use indoors. They dry quickly, allowing for multiple coats in a short amount of time. Acrylics also offer excellent color retention and are less prone to yellowing over time. Their water-based nature makes them easy to clean up. They are very forgiving, reducing the chance of ruining your model. Overall, acrylics are an excellent all-around choice for diecast model painting.
Disadvantages of Acrylic Paints
While acrylic paints are user-friendly, they have some drawbacks. They can be less durable than other paint types, making them susceptible to chipping and scratching. Achieving a perfectly smooth finish with acrylics can sometimes be challenging without proper airbrushing techniques. Acrylics also require the use of specific primers and sealers to ensure adhesion and protection. Compared to other paints, acrylics are less resistant to solvents.
Enamel Paints
Enamel paints are oil-based and known for their durability and glossy finish. They provide a robust, long-lasting coating that is resistant to scratches and wear. Enamels require the use of solvents for thinning and cleaning, and they tend to dry slowly, which can be both an advantage and a disadvantage. Their slow drying time allows for more time to correct mistakes, but it also increases the overall painting time. Enamel paints are a good choice for those seeking a hard-wearing finish on their diecast models.
Advantages of Enamel Paints

Enamel paints provide a highly durable finish, making them ideal for models that will be handled frequently. They offer excellent coverage and self-leveling properties, which can result in a smooth, glossy surface. Enamels are also resistant to many chemicals and solvents. The slow drying time allows for easier blending and correction of imperfections. Overall, they are a good choice for modelers who want a strong, high-gloss finish.
Disadvantages of Enamel Paints
Enamel paints have some disadvantages. They contain strong solvents, which can be hazardous and require adequate ventilation. They have a long drying time, which can slow down the painting process. Cleaning up enamel paints requires the use of harsh solvents. These paints also tend to have a strong odor. Their slower drying time can also lead to dust or debris settling on the surface if not handled carefully.
Lacquer Paints
Lacquer paints are solvent-based and known for their fast-drying times and high gloss finishes. They are popular among experienced modelers for their ability to produce a smooth, professional-looking result. Lacquers dry very quickly, allowing for rapid application of multiple coats. However, they require careful handling due to their strong fumes and potential for shrinking. They often require the use of specific primers and thinners. Lacquer paints are ideal for those who want a fast-drying paint with a high-gloss finish.
Advantages of Lacquer Paints

Lacquer paints offer the quickest drying times of the three paint types, making them ideal for projects where speed is essential. They typically produce a very smooth, glossy finish, which is excellent for achieving a high-quality look. Lacquers also offer excellent durability once they are fully cured. They are easy to apply with an airbrush and can be polished to a mirror-like shine. Overall, the speed and finish make them a favourite for those looking for a professional look.
Disadvantages of Lacquer Paints
Lacquer paints have several drawbacks. They contain strong solvents and release significant fumes, requiring the use of a respirator and adequate ventilation. They can be prone to shrinking, which can expose underlying layers. Lacquers are also more likely to react with other types of paints, so it is crucial to use compatible primers and topcoats. They require more experience to use properly. They can also be difficult to remove if mistakes are made. For beginners, they may present a steeper learning curve.
Preparing Your Diecast Car for Painting
Proper preparation is essential for a flawless paint job on your diecast model. This involves several steps to ensure the paint adheres correctly and the finish is smooth and even. Skipping these steps can lead to imperfections, such as peeling, bubbling, or a rough surface. Taking the time to prepare your model correctly will significantly improve the final result of your painting efforts.
Cleaning the Model

Before painting, thoroughly clean your diecast car to remove any dust, grease, or fingerprints. Use warm water and mild dish soap, then rinse the model thoroughly and let it dry completely. This ensures that the paint will adhere properly to the surface. Avoid using harsh chemicals or abrasive cleaners, which can damage the model’s surface. Proper cleaning creates a clean base for the paint, enhancing its adhesion and finish.
Removing Old Paint
If your model has existing paint, you will need to remove it before applying a new coat. There are several methods for paint removal, including chemical strippers and abrasive methods like sandblasting. Chemical strippers are effective but require careful handling and proper ventilation. Sandblasting can be faster but carries the risk of damaging delicate details. Choose the method that is best suited to your model and experience level. Removing the old paint ensures a smooth surface for the new paint.
Sanding and Priming
After removing the old paint, sand the model with fine-grit sandpaper to smooth out any imperfections. This step is crucial for ensuring a smooth surface for the primer and paint. After sanding, apply a primer specifically designed for diecast models. The primer provides a base for the paint to adhere to, improves coverage, and helps to reveal any remaining imperfections. Allow the primer to dry completely before applying the base coat. Sanding and priming ensure that the paint adheres well and the finish is even.
The Painting Process Step-by-Step

Once the model is prepared, the painting process can begin. Whether you’re using an airbrush or paintbrushes, following a step-by-step approach is essential for achieving a professional finish. This includes applying the base coat, adding details, and applying a clear coat. Each step is important to building up a high-quality finish that will last. Careful application and patience are key to success.
Applying the Base Coat
Apply the base coat in thin, even layers. If using an airbrush, hold it a few inches away from the model and move it smoothly back and forth. For brush painting, use a soft brush and avoid applying thick coats, which can lead to drips and runs. Allow each coat to dry completely before applying the next. Multiple thin coats will give a better finish than a single thick coat. Applying multiple coats is a key step.
Applying the Details
Once the base coat is dry, you can add details such as stripes, logos, and other markings. Use masking tape to protect areas that you do not want to paint. For small details, consider using fine-tipped paintbrushes or specialized detailing tools. Patience and a steady hand are essential for achieving accurate details. The detailing stage truly brings the model to life.
Applying Clear Coat

After the base coat and details have dried completely, apply a clear coat to protect the paint and add shine. The clear coat provides a layer of protection against scratches and UV damage. Apply the clear coat in thin, even layers, allowing each layer to dry before applying the next. For best results, use a clear coat that is compatible with the base coat. A good clear coat enhances the overall look of the finished model and protects your hard work.
Tools and Equipment Needed
Having the right tools and equipment can significantly improve your painting results. Whether you are a beginner or an experienced modeler, having the right tools makes a difference. This section covers essential equipment, from airbrushes to masking tape. A good setup ensures precision, ease of use, and professional results. Make sure to have the correct equipment to complete your model car project.
Airbrush
An airbrush is the preferred tool for painting diecast models due to its ability to apply paint in thin, even layers. Airbrushes come in different types, including single-action and dual-action models. Dual-action airbrushes offer more control over paint flow and are recommended for more experienced modelers. Make sure to clean your airbrush thoroughly after each use to prevent clogging. An airbrush is crucial for achieving a smooth, professional finish.
Paintbrushes

While an airbrush is ideal for base coats, paintbrushes are essential for applying details. Choose high-quality paintbrushes with fine tips for precise work. Different brush sizes are necessary for various details. When brushing, avoid applying too much paint to prevent runs and uneven coverage. Paintbrushes provide the precision necessary to bring out the fine details of a model car.
Masking Tape
Masking tape is essential for creating clean lines and preventing paint from getting where it shouldn’t. Use low-tack masking tape specifically designed for model painting to avoid damaging the paint surface. Carefully apply the tape to areas you want to protect and press it down firmly to create a seal. Clean lines and precise color separation depend on the use of good quality masking tape.
Safety Precautions
Working with paints and solvents requires careful attention to safety. Protect yourself and your workspace by following these safety precautions. Proper ventilation, the use of a respirator, and eye protection are essential for preventing health issues. Safety should always be the first priority.
Ventilation
Always paint in a well-ventilated area. Open windows and doors to ensure adequate airflow or use an exhaust fan to remove fumes. Good ventilation is critical to prevent the buildup of harmful vapors from paints and solvents. Proper ventilation minimizes health risks associated with inhalation of paint fumes.
Respirator
Use a respirator with appropriate filters when painting, especially with enamel and lacquer paints. A respirator protects your lungs from inhaling harmful fumes and particles. Choose a respirator designed for paint fumes and solvents. It is a vital piece of safety equipment that should always be used when painting.
Eye Protection
Wear safety glasses or goggles to protect your eyes from paint and debris. Paint can splash and cause irritation or injury if it gets into your eyes. Safety glasses are an inexpensive investment. Eye protection ensures your safety while painting.